• Skip to primary navigation
  • Skip to main content
  • Skip to primary sidebar

WP Dev Life

A Journey through WordPress

  • About Jay
  • Dev Tools
  • Contact Us

AWS

Improve WP Search with ElasticSearch

February 20, 2018 by Jay

AWS has all kinds of amazing features that you can couple with your WordPress site. We’ve covered using the Simple E-mail Service for sending your WordPress e-mails and this time around we’ll be covering using the ElasticSearch service and 10up’s ElasticPress plugin. In my testing this greatly improved the search functionality and lessened the load on the web server’s MySQL instance. Note: Using ElasticSearch will increase your AWS bill.

Creating Your ElasticSearch Cluster

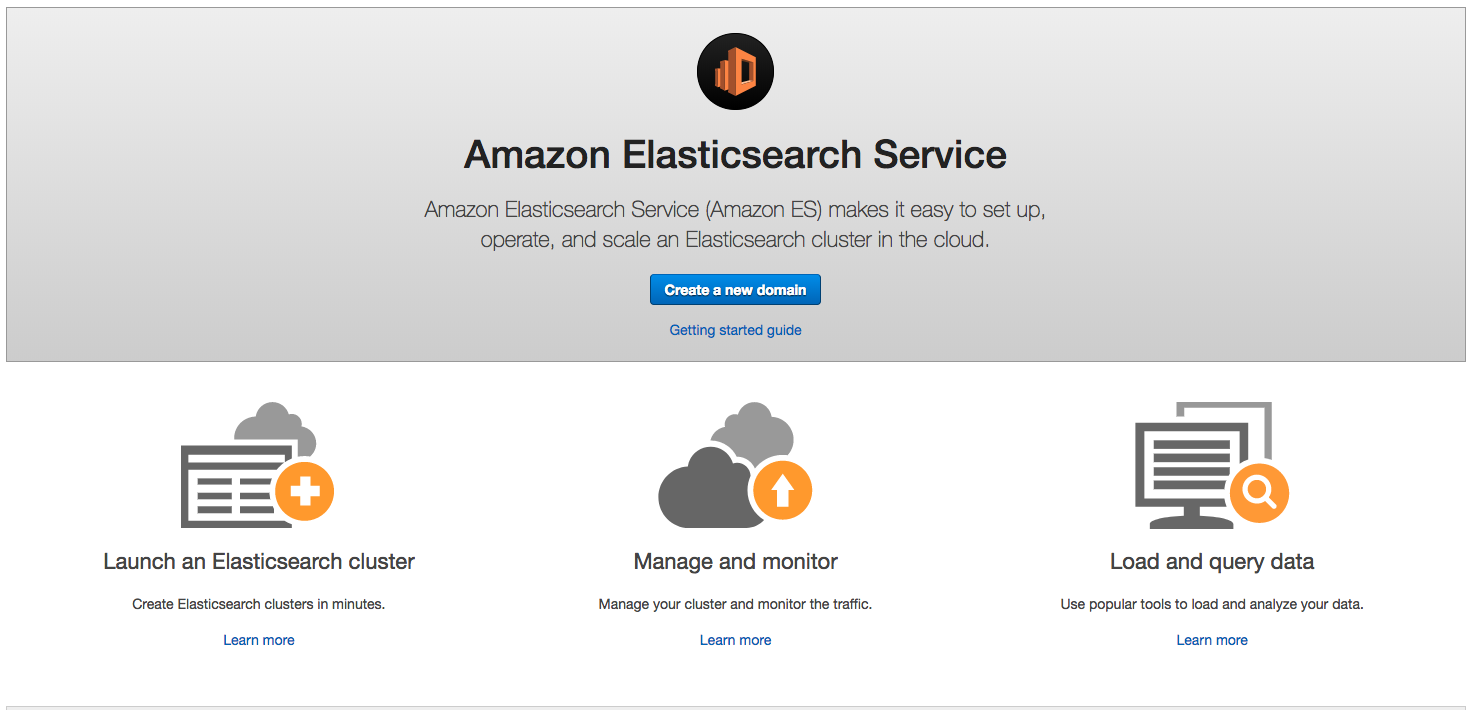
For the purposes of this article we’ll be utilizing some smaller-tier instances as noted above, this service does incur compute charges. Once you’re at the ElasticSearch Console create a New Domain.

On the next screen you’ll put in a domain, this doesn’t need to be your actual domain name but The name must start with a lowercase letter and must be between 3 and 28 characters. Valid characters are a-z (lowercase only), 0-9, and – (hyphen).

Last time I set this up, I think ElasticPress complained about using ElasticSearch 6.0, so choose 5.5. 

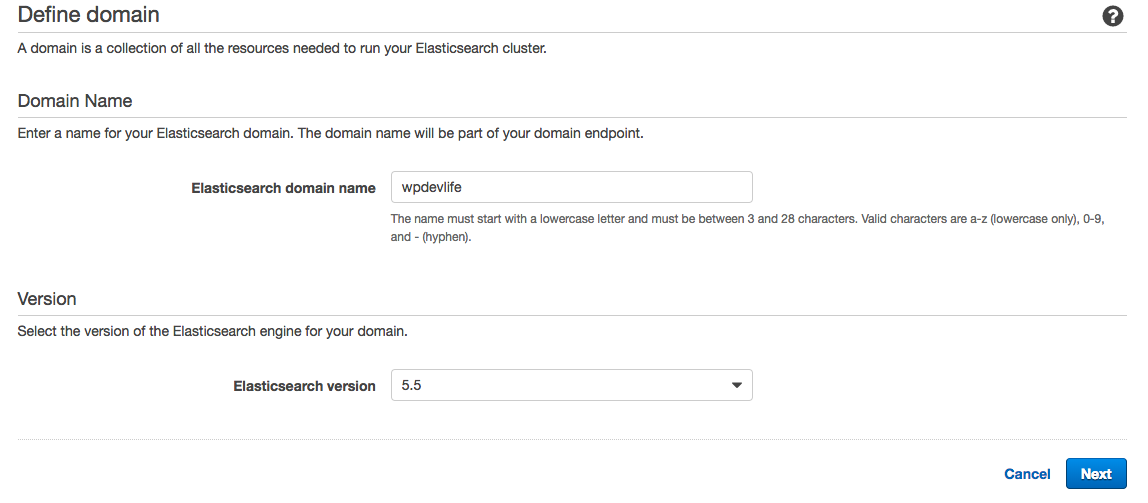
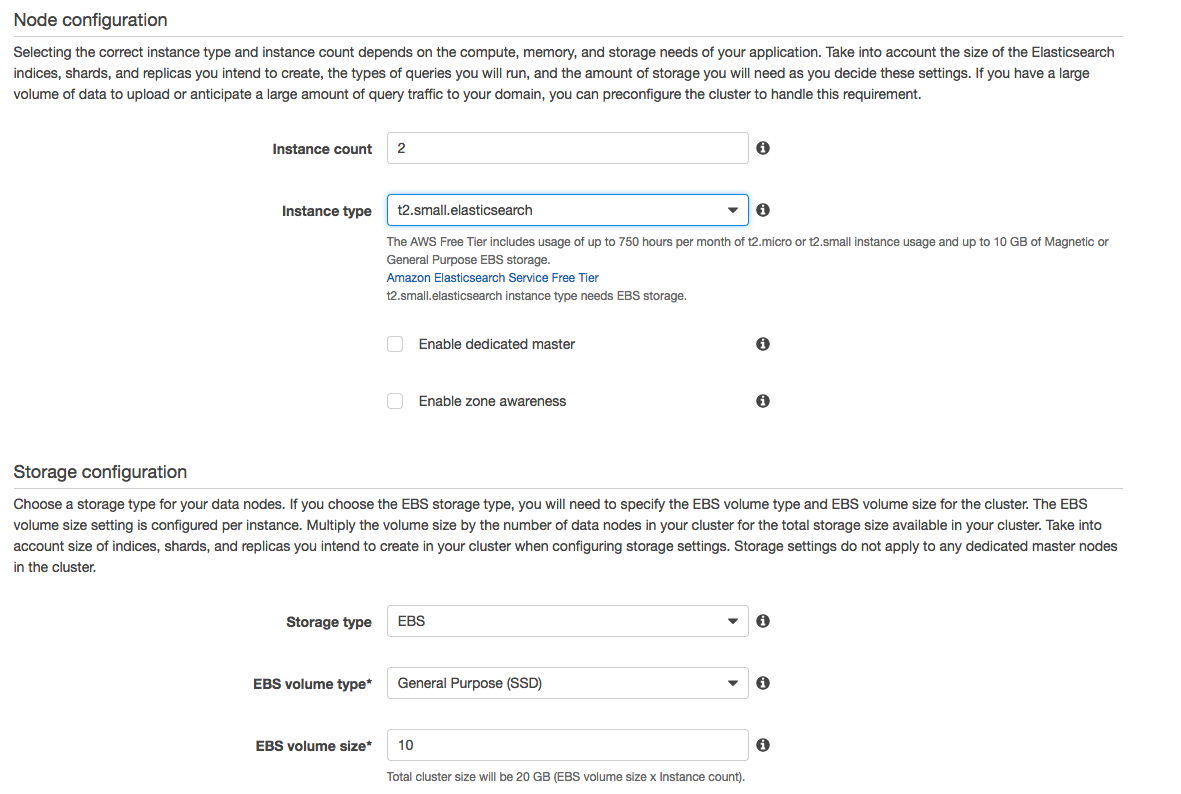
To get good health you’ll want to utilize more than 1 instance. So we’ll go with 2 for now. You may need more depending on the amount of search traffic that your site gets. I’ve chosen the t2.small instances for now and this should be good for testing purposes in your staging environment. In production I would maybe add a few more instances or go with a larger EC2 instance type.

On the next page we’ll setup the Access Policy based on your server’s IP address to ensure that no one outside of your IP address can modify any indexes or delete any data.

Choose Public Access in the first section, and then in the Access Policy dropdown choose “Allow access to the domain from specific IP(s)” to configure an Access Policy. 
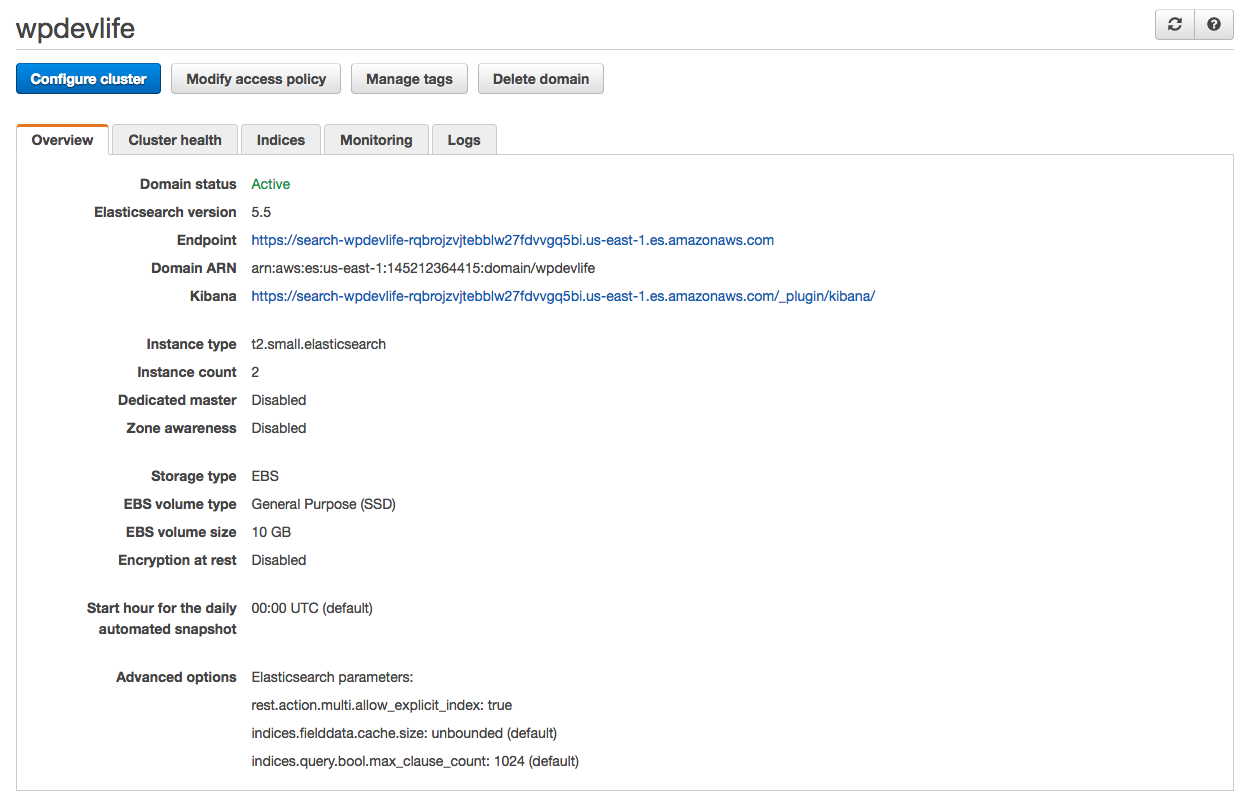
Review the settings and then confirm to begin the process of creating the cluster. This usually takes about 10 minutes.

Configuring ElasticPress

While your ElasticSearch cluster is spun up now is a good time to setup the ElasticPress plugin. If you have SSH access that allows you to git clone you can run git clone https://github.com/10up/ElasticPress.git elasticpress to clone the plugin directly into your site, or install it via the Plugin page.

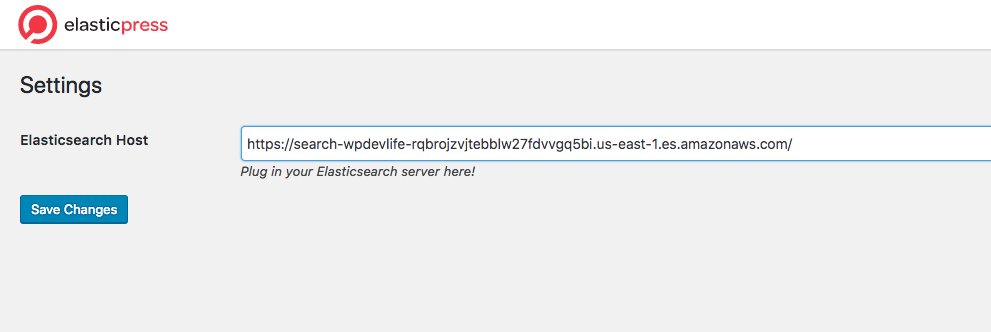
Once installed and activated go to the ElasticPress dashboard to begin Setup. Grab your ElasticSearch hostname from the AWS Console as Endpoint.


Once that’s done you’re ready to index the site. You’ll need WP CLI access, or if your host doesn’t provide that, contact them to run wp elasticpress index –setup

Final Thoughts

ElasticSearch, while does present an additional cost to operating your site, can be beneficial to help improve your User Experience and help lessen the load on your database for an ecommerce store with a ton of products, or a general news site with thousands of articles.

If you see any issues feel free to let me know using the Contact page. If you find this useful feel free to share this on Social Media.


Filed Under: AWS, WordPress Tagged With: aws, elasticsearch

Use Amazon SES to send WordPress E-mails

February 19, 2018 by Jay

I originally wrote this guide for a WP Engine Support Garage article, as WPEngine  utilizes the Google Cloud Platform which will block sending e-mail over specific ports, and I wanted to provide an easy to use alternative. The article eventually got published on a co-workers blog, but I decided to publish it here as well. More visibility is better right?

Google allows only Google Apps to send email through ports 465 and 587, and prohibits any service from sending mail through port 25.

Many email providers have created better ways of sending or relaying email through alternate ports or APIs. But Microsoft Office 365 among others are left in the lurch when it comes to sending outgoing emails through Google Cloud servers. If you’re one of the many affected by this issue, this guide will help you configure email through Amazon Simple Email Service (SES) to send outgoing emails from your WordPress site.

This post is only going to cover sending e-mails out of your WordPress site, so password resets, transaction confirmations, and other similar types of e-mails. You could in theory use this and a mailing list plugin, but I recommend using an actual service for your mailing list such as MailChimp.

Setup your DNS Records

The first step is to validate your domain with the SES service–This requires adding DNS records with your DNS provider. The process is the same with any DNS provider, but we are using CloudFlare’s DNS dashboard in this example.

Log in to the Amazon Web Services console and navigate to the SES page. Then click “Domains” from the left-hand navigation menu. Click “Verify a new domain” and enter your domain name. If you want to utilize DKIM then you can also generate DKIM signatures in this step. On the next screen you’ll be given your DNS records to set up within your DNS provider.

Add the DNS records from the Domain Verification Page

You can take the Type and Value fields from these records and paste them directly into your DNS provider’s dashboard. In our CloudFlare example simply log in, choose your domain name, and select “DNS records.” In the dropdown menu to select a type of record, choose “TXT” – then in “Value” enter the “Name” field from the Domain Verification Record, and in the box next to it, enter the “Value” field. Once Amazon SES has been able to detect the records have been added, your domain is verified for use with their service.

If you utilize an email provider for your domain’s emails such as Google Suite, Outlook365, or another email server then you do not need to input the MX record and will leave your current MX records as is. This means only your outgoing emails will be handled by Amazon SES.

Create an E-mail User

Now that Amazon has been able to verify our domain for sending email we need to create an SMTP user for our WordPress site to use for sending email. On the SES console home page, click “SMTP Settings” from the left-hand navigation. Then click the “Create My SMTP Credentials” button. Leave the default username as-is and click “Create.”

On the next screen be sure to download your login credentials–we will need them in the next step. To do this, just click “Show User SMTP Security Credentials” and you can copy and paste them into your text editor of choice.

Install & Configure an SMTP Plugin

Now that we’ve configured Amazon SES it’s time to configure your WordPress install to utilize the service. We’re going to be using the Easy WP SMTP plugin for this step. You can install this plugin by going to your plugins page in the WordPress Admin Dashboard of your site and going to Plugins > Add New > search for Easy WP SMTP > Install. Once installed you’ll want to activate the plugin so  we can configure it.

Google Cloud servers have ports 25, 465, and 587 disabled by default, but you can still use port 2587.

  • In the “From” field, put an email address you want WordPress to send email from. This could be anything as long as it has your domain name in it.
  • For the “Name” you can put anything you want your emails to show as from.
  • You can get your SMTP Host at the Amazon SES SMTP Settings page. If you setup SES in the US-East-1 region it will be: email-smtp.us-east-1.amazonaws.com.
  • Ensure that TLS is selected for the Type of Encryption setting.
  • For the sending port, input 2587.
  • Check the SMTP Authentication to yes and input your SMTP username and password that was created in the previous step.

Your settings should then look similar to this:

Configure the SMTP plugin

Send a Test E-mail

Now that your settings are configured, you’ll want to send a test email to make sure it’s working right. Right now your SES account is still in Sandbox mode, so we need to configure an email address to send email to first. In your Amazon SES console, click “Email Addresses.”

Click “Verify A New Email address,” enter in the email address you want to verify. Then click the “Verify This Email Address.” This will send an email to the specified email address. You’ll need to click the link within it to verify your email address. If you do not verify your email address, Amazon won’t send the email.

Once verified, head to the Easy WP SMTP Settings page in your dashboard and scroll down to the “Testing and Debugging Settings” section. Input the verified email address, a subject and message, and then send. Check your email to ensure that it was delivered. If it was not delivered, confirm your email address is validated and your port settings.

Request Amazon release Sandbox Mode

Amazon keeps your SES service in what is called Sandbox Mode which requires that all email addresses you send to be verified before email deliverability can be achieved. We need to request Amazon enable production access to SES by utilizing their support system for a Service Limit Increase.

Ensure “Service Limit Increase” is selected, and “Limit Type” is set for “SES Sending Limits.” In “Request 1” choose the region you setup SES for and then choose “SES Production Access.” Fill out the rest of the boxes and submit the request. Amazon typically takes 24 hours to grant access to Production Mode for SES.

Once they have taken SES out of Sandbox mode you should be able to test your site’s emails to ensure they’re delivering properly. Be sure to test any eCommerce emails, contact forms, or transactional emails. You should also ensure that your contact forms have a captcha configured. This ensures spammers are not able to abuse your forms, which in turn abuses your SES service.

That’s all there is to it! I hope you have found this useful. If you have any questions don’t hesitate to reach out!

Filed Under: AWS, WordPress Tagged With: aws, email, wordpress

Primary Sidebar

Learn Linux

Use LinuxAcademy to learn Linux, AWS, or other Cloud technologies.

Find Something

Categories

Recent Posts

  • Using withSelect for WordPress Block Components
  • Gutenberg: Attributes vs State
  • Getting Started with Unit Tests
  • WordPress REST API
  • Authentication and the REST API

Archives

  • November 2019
  • May 2019
  • January 2019
  • July 2018
  • February 2018

Copyright © 2025 · Wp Devlife on Genesis Framework · WordPress · Log in